By Mike Bumbeck, automedia.com
Difficulty: Moderate
Estimated time: 240 minutes
While plunging headlong into things is sometimes required, most of the time it is better to take on challenges one step at a time. This is often the case in the mechanical world of automobiles. Examples abound. Tightening the lug nuts on a wheel. Using the proper sequence of torque while cinching down a cylinder head onto an engine block. Even something as mundane as getting a car or truck paint job to shine on a Sunday afternoon requires careful steps. Rinse. Wash. Dry. Wax. Buff. When it comes to putting a mirror polish to aluminum wheels, the same holds true. Each step of the process brings the aluminum closer to a proud shine.
The number of steps required to bring an aluminum wheel to a mirror finish depends largely on the condition of the wheel itself. A good rinse and dry may be the one and only step if the wheels are in excellent shape. That same rinse may be the first of many steps if neglect has left the once shining wheels looking gray and cloudy. With a fair amount of elbow grease and careful use of power tools, even the crustiest of junkyard-sourced aluminum wheels can be brought back to a mirror shine.
To put this to the test, we went and got an extra crusty set of '70s vintage US Indy slot mags off of an equally vintage Toyota SR5 Liftback at the local self-service junkyard. They are called mags because aluminum is mixed up with a bit of magnesium to form a stronger alloy. This alloy is what requires polishing. The first step in this case amounted to a long day at the junkyard fussing with stubborn lug nuts.
Correct buffing technique
Buffing out aluminum, or any metal for that matter, involves smoothing out the irregular surfaces of the metal itself.
While an aluminum wheel may feel smooth, the surface is actually quite rough when it comes to reflecting light. Under a microscope, a dull or pitted aluminum wheel would look sort of like a bowl of cornflakes. Jagged. Edgy. Rough. When light hits these rough surfaces, it diffuses and dissipates. The wheel appears dull because the light stops at the surface. A polished aluminum surface under a microscope looks more like a bowl of hot oatmeal – a little bumpy, but mostly smooth and flat. When light hits a mostly flat surface, it has nowhere to go but right back, hence the shine.
The best way to smooth out the peaks and valleys of aluminum is to use a series of buffing wheels and compounds. The spinning material of the buffing wheel works in conjunction with the abrasive material in the buffing compounds to smooth out the aluminum. The steps are key.
Each buffing wheel and compound must be used correctly and in sequence. Stiff buffing wheels with coarser compounds work into softer wheels and compounds with less of a bite. As important as the wheels and compounds is the buffing technique. The right balance of rpm and pressure is the trick. Too little pressure and all you get is compound and bits of the buffing wheel all over the place. Too much pressure and the compound can burn the surface instead of buffing it. Practice on the back of the wheel to get a feel for the process before going nuts on the front. Always work from coarse to smooth, and use a dedicated buffing wheel for each compound.
Do-it-yourself buffing
A professional shop that handles a great number of wheels usually has a giant machine in a room thick with a mix of aluminum dust and buffing compound the color of pencil lead. Those with well-equipped garages may already have a smaller, dedicated buffer. For the do-it-yourselfer, there are a few options. Before you get started, remember to take safety precautions. High-rev, high-torque power tools can be dangerous! Wear a mask, gloves and safety goggles at all times while buffing aluminum.
The first do-it-yourself option is to secure the buffing wheel and move the object around it. A standard bench grinder can be converted to a buffing setup with some ingenuity and a few arbors. Be absolutely certain the grinder is securely bolted down if this route is taken. The buffing wheel can easily grab the item being worked on. At this point, one of two things will give. Either the object will fly out of your hands, or the grinder will liberate itself from its mount. Either scenario is bad news.
Another option is to make the object stationary and move the buffing wheel around it. A variety of power tools are suited for this task. In this case, we used a variable speed buffer and a few 6-inch buffing wheels. Be cautious and take your time. And remember that only bare aluminum wheels can be buffed out. The buffing process will quickly destroy any paint or clearcoat on the wheels. Be certain bare aluminum wheels are what you have before you get started.
How to buff your wheels
Follow the steps below to bring your wheels to a great shine.

Step 1: Here is the junkyard-fresh set of wheels. We're not out for a Barrett-Jackson job, just a shiny set of daily drivers.

Step 2: Cut away and remove anything that will get in the way of the process. Valve stems. Wheel weights. Stickers. Everything.

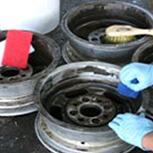
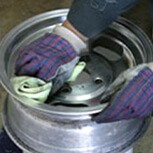
Step 3: Next, get things clean. Use a powerful degreaser, heavy-duty scouring pads and some elbow grease.

Step 4: Thoroughly rinse the wheels. You don’t want to buff any grime into the aluminum.

Step 5: Use a flat file to smooth any nasty curb rash. Do not remove too much material or wheel balance could be affected.

Step 6: Apply a bit of the coarsest or most abrasive compound to the stiffest buffing wheel.

Step 7: Use the right combination of rpm and pressure to get the compound working. Buff the entire wheel one section at a time.

Step 8: Clean the entire wheel surface in between each step.

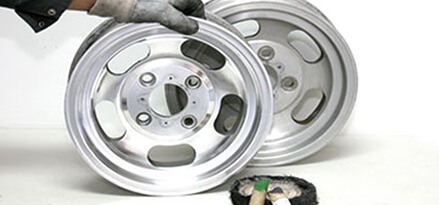
Step 9: Use a separate wheel for each compound to prevent contamination between steps. Here, a less abrasive compound is used with a “loose sewn” wheel for a finish buff.

Step 10: A hand-applied liquid hand polish and subsequent hand buff is the final step. Now, buff out the other three wheels.

